How to Cook Ancient Grains: The Complete Guide
Master the art of cooking ancient grains with our comprehensive guide covering water ratios, cooking times, techniques, and flavor tips for every grain.


Ancient grains have earned their place in modern kitchens for good reason. They bring nutty flavors, satisfying textures, and exceptional nutrition to any meal. But if you have ever stared at a bag of amaranth or a box of freekeh and wondered what to do with it, you are not alone. Each grain has its own personality - its own water ratio, cooking time, and ideal technique.
This guide covers water ratios, cooking times, and technique tips for every major ancient grain.
The Master Cooking Table
Before we dive into techniques, here is the reference table you will keep coming back to. All ratios are by volume (1 cup of dry grain), and cooking times assume a stovetop simmer with a lid on.
| Grain | Water Ratio | Cooking Time | Yield | Notes |
|---|---|---|---|---|
| Amaranth | 1:2.5 | 20–25 min | ~2.5 cups | Gets porridge-like; do not stir |
| Barley (hulled) | 1:3 | 45–60 min | ~3.5 cups | Soak overnight to reduce time |
| Barley (pearled) | 1:2.5 | 25–30 min | ~3 cups | Faster but less fiber |
| Buckwheat groats | 1:2 | 10–15 min | ~3 cups | Toast first for nutty flavor |
| Bulgur (fine) | 1:1 | 5–7 min (soak) | ~2 cups | Just pour boiling water over |
| Bulgur (coarse) | 1:2 | 12–15 min | ~2.5 cups | Simmer gently |
| Einkorn berries | 1:2 | 25–30 min | ~2.5 cups | Soak 8 hrs for best results |
| Emmer/Farro (whole) | 1:3 | 30–40 min | ~3 cups | Soak overnight recommended |
| Farro (semi-pearled) | 1:2.5 | 20–25 min | ~2.5 cups | Most common type sold |
| Farro (pearled) | 1:2 | 15–20 min | ~2.5 cups | Fastest, least fiber |
| Freekeh (cracked) | 1:2.5 | 15–20 min | ~3 cups | Smoky flavor, no soak needed |
| Freekeh (whole) | 1:2.5 | 30–35 min | ~3 cups | More chewy, roasted flavor |
| Kamut/Khorasan | 1:3 | 40–60 min | ~3 cups | Soak overnight; buttery taste |
| Millet | 1:2 | 15–20 min | ~3.5 cups | Toast first; fluffs like couscous |
| Oat groats | 1:3 | 30–40 min | ~3 cups | Chewy; great in grain bowls |
| Quinoa | 1:1.5 | 12–15 min | ~3 cups | Rinse well before cooking |
| Sorghum | 1:3 | 45–60 min | ~3 cups | Soak to reduce cook time |
| Spelt berries | 1:3 | 40–60 min | ~2.5 cups | Soak overnight for even cooking |
| Teff | 1:3 | 15–20 min | ~2.5 cups | Very small; gets creamy |
Keep this table handy. You will notice patterns: smaller grains cook faster, whole grains need more water and time, and soaking almost always helps with the tougher berries.
For a full overview of these grains and their nutritional profiles, see our complete ancient grains list.
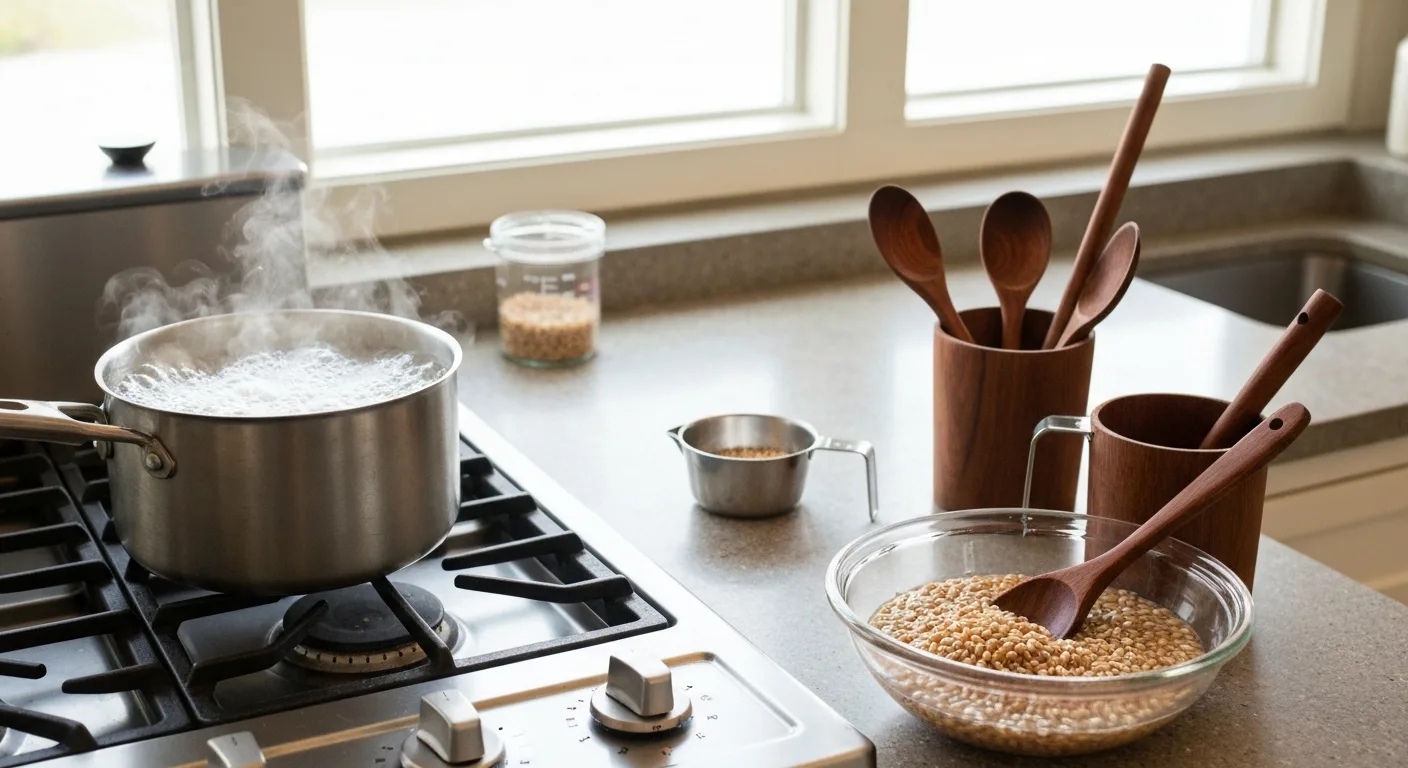
Step 1: Rinse and (Sometimes) Soak
Rinsing
Always rinse your grains before cooking. Place them in a fine-mesh strainer and run cold water over them for 30 to 60 seconds, agitating with your hand. This removes surface starch, dust, and any residual debris from processing.
Rinsing is especially critical for quinoa, which has a natural coating of saponins - bitter compounds that protect the plant from pests. Most commercial quinoa is pre-washed, but a thorough rinse ensures no residual bitterness remains.
For very small grains like teff and amaranth, use a strainer with an ultra-fine mesh, or line a regular strainer with cheesecloth.
Soaking
Soaking is optional for most grains but highly beneficial for whole, unprocessed varieties:
- Always soak (8–12 hours): Whole farro, spelt berries, kamut, einkorn berries, hulled barley, sorghum
- Helpful but not required (2–4 hours): Oat groats, whole freekeh
- No soak needed: Quinoa, millet, teff, amaranth, bulgur, pearled/semi-pearled farro, buckwheat, cracked freekeh
Soaking reduces cooking time by 30 to 50 percent, improves texture by allowing more even water absorption, and breaks down some phytic acid, which can inhibit mineral absorption. Drain and rinse soaked grains before cooking.
If you forget to soak overnight, a quick soak works in a pinch: cover grains with boiling water and let them sit for one hour.
Step 2: Choose Your Cooking Method
The Stovetop Absorption Method
This is the default method for most grains and works exactly like cooking rice.
- Combine the rinsed grain and water (per the table above) in a heavy-bottomed pot with a tight-fitting lid.
- Add a pinch of salt - about half a teaspoon per cup of grain.
- Bring to a boil over high heat.
- Reduce heat to the lowest setting that maintains a gentle simmer.
- Cover and cook for the time listed in the table. Do not lift the lid during the first two-thirds of cooking.
- When time is up, check for doneness. The grain should be tender but still have a slight chew. If water remains, drain it. If the grain is not yet tender, add a few tablespoons of water and cook another 5 minutes.
- Remove from heat, keep the lid on, and let the grain rest for 5 to 10 minutes. This final steaming step makes a noticeable difference in texture.
- Fluff with a fork and serve.
The Pasta Method (Boil and Drain)
For whole grain berries like farro, spelt, and kamut, this method is practically foolproof.
- Bring a large pot of salted water to a rolling boil - use at least 6 cups of water per cup of grain, just like cooking pasta.
- Add the rinsed (and ideally soaked) grain.
- Boil uncovered, stirring occasionally, until the grain reaches your desired tenderness.
- Drain in a colander.
The advantage here is that you do not need to worry about water ratios at all. The grain absorbs what it needs, and you discard the rest. The slight downside is that some water-soluble nutrients go down the drain, but the convenience factor is hard to beat.
Rice Cooker Method
Most rice cookers handle ancient grains beautifully. Use the same water ratios from the master table and select the brown rice or whole grain setting if your cooker has one.
A few rice cooker tips:
- Grease the inner pot lightly with oil to prevent sticking, especially for starchy grains like amaranth and teff.
- Expect the cycle to take longer than white rice. If your cooker finishes before the grain is tender, start another cycle with a splash more water.
- Quinoa, millet, and buckwheat work particularly well in rice cookers.
Instant Pot / Pressure Cooker Method
Pressure cooking is a game-changer for tough whole grains. It can cut cooking time by half or more and produces consistently tender results. Use the manual/pressure cook setting on high.
| Grain | Water Ratio | Pressure Cook Time | Release |
|---|---|---|---|
| Amaranth | 1:1.5 | 6 min | Natural 10 min |
| Farro (semi-pearled) | 1:2 | 10 min | Quick |
| Farro (whole) | 1:2.5 | 20 min | Natural 10 min |
| Kamut | 1:2 | 25 min | Natural 10 min |
| Millet | 1:1.5 | 10 min | Natural 10 min |
| Quinoa | 1:1.25 | 1 min | Natural 10 min |
| Sorghum | 1:2.5 | 25 min | Natural 10 min |
| Spelt berries | 1:2 | 25 min | Natural 10 min |
Note that pressure cooker water ratios are lower than stovetop because almost no steam escapes during cooking. Always do a natural pressure release for at least 10 minutes before switching to quick release - this prevents grain from sputtering out of the valve and gives it time to finish absorbing water.
Step 3: Build Flavor
Plain water and salt produce perfectly good grain, but a few simple additions can transform your results.
Toast Before Cooking
Dry-toasting grains in the pot for 2 to 3 minutes before adding water develops a deeper, nuttier flavor. This technique works especially well with millet, buckwheat, quinoa, and amaranth. Stir constantly over medium heat until the grains become fragrant and you hear occasional popping. Then carefully add your water (it will sputter) and proceed as usual.
Swap the Cooking Liquid
Replace some or all of the water with:
- Broth or stock for savory dishes - the single most impactful upgrade
- Coconut milk for creamy, subtly sweet grains (excellent with millet and quinoa)
- Tea - jasmine tea with millet, or chai-spiced tea with teff for porridge
Aromatics in the Pot
Add any of the following to the cooking water:
- A bay leaf
- A smashed garlic clove
- A strip of kombu seaweed (adds umami and minerals)
- A cinnamon stick for sweet applications
- A tablespoon of butter or olive oil
Finish with Fat and Acid
Once cooked, toss the grain with a drizzle of good olive oil, a squeeze of lemon juice, and fresh herbs. This simple step elevates even the most basic cooked grain into something you will want to eat on its own.
Batch Cooking and Meal Prep
Ancient grains are among the best foods for meal prep. Most cooked grains keep for 4 to 5 days in the refrigerator and 3 to 6 months in the freezer.
Batch Cooking Strategy
Cook a large batch - 2 to 3 cups dry - at the start of the week. This gives you 6 to 9 cups of cooked grain to use in various meals:
- Monday: Grain bowl with roasted vegetables and tahini dressing
- Tuesday: Tossed into soup for body and protein
- Wednesday: Mixed into a salad with fresh herbs and vinaigrette
- Thursday: Fried grain (like fried rice) with eggs and vegetables
- Friday: Stuffed peppers or tomatoes
Refrigerator Storage
Transfer cooked grains to an airtight container within an hour of cooking. Spread them on a sheet pan first if you want to cool them quickly and prevent clumping. Properly stored grains keep 4 to 5 days. They may firm up in the fridge; just add a splash of water when reheating.
Freezer Storage
Freeze grains in measured portions - 1 or 2 cup amounts work best. Use freezer bags with the air pressed out, or rigid containers with minimal headspace. Label with the grain type and date.
To reheat from frozen, microwave with a tablespoon of water for 2 to 3 minutes, or thaw in the refrigerator overnight and warm on the stovetop.
Reheating Tips
- Microwave: Add 1 to 2 tablespoons of water per cup of grain. Cover and heat in 1-minute intervals, fluffing between rounds.
- Stovetop: Add a splash of water or broth to a saucepan, add grain, cover, and heat over medium-low for 3 to 5 minutes.
- Skillet: For a different texture, sauté cold grains in oil or butter over medium-high heat until heated through and slightly crispy on the edges. This is excellent for grain bowls and as a topping for salads.
Common Mistakes and How to Avoid Them
Using too much water. This is the most common error, especially with quinoa and millet. The result is mushy, waterlogged grain. Follow the ratios in the table and err on the side of less water - you can always add more.
Skipping the rinse. Unrinsed quinoa tastes bitter. Unrinsed millet and amaranth can taste dusty. It takes 30 seconds and makes a real difference.
Cooking on too high a heat. Once you bring the pot to a boil, reduce to the lowest possible simmer. Ancient grains scorch easily on the bottom if the heat is too aggressive.
Lifting the lid too often. Every time you lift the lid, steam escapes and the cooking time extends. Trust the process and check only near the end.
Not resting the grain. Skipping the 5 to 10 minute rest after cooking results in a wetter, less fluffy texture. The resting period lets the grain finish absorbing residual moisture.
Treating all grains the same. Each grain has a distinct personality. The delicate pop of teff is nothing like the hearty chew of kamut. Learning each grain’s characteristics is part of the pleasure.
Grain-by-Grain Quick Tips
Quinoa: The gateway grain for most people. Rinse thoroughly, use a 1:1.5 ratio, and resist the urge to add more water. See our detailed quinoa cooking guide for advanced techniques.
Farro: Italy’s beloved grain comes in three forms with different cooking times. The semi-pearled variety is the sweet spot between nutrition and convenience. Our farro cooking guide covers all three types in depth.
Millet: Wildly underrated. Toasted millet with a 1:2 ratio produces light, fluffy grains similar to couscous. With a 1:3 ratio and stirring, it becomes creamy like polenta.
Amaranth: Cooks into a porridge-like consistency regardless of technique. Embrace this - it makes excellent hot cereal, thickener for soups, or a polenta substitute. Do not expect separate, fluffy grains.
Teff: The world’s smallest grain cooks in 15 minutes and produces a creamy, slightly molasses-flavored porridge. Wonderful as a breakfast cereal or as injera (Ethiopian flatbread) batter.
Buckwheat groats (kasha): Not a true grain but cooked like one. Toast the groats in a dry skillet first - this is non-negotiable for the best flavor. Cooked buckwheat makes an earthy, satisfying base for bowls.
Freekeh: Young green wheat that has been roasted, giving it a distinctive smoky flavor. It is one of the fastest-cooking whole grains and needs no soaking. Treat it like a smoky alternative to rice.
Sorghum: Large, round grains with a neutral flavor and popcorn-like pop when bitten. Takes patience (45 to 60 minutes) but rewards you with a versatile, mild grain that works in almost any context.
Putting It All Together
The best way to learn ancient grains is to start cooking them. Pick one grain you have never tried, buy a bag, and cook a batch this week. Use it wherever you would normally use rice or pasta. Once you are comfortable, try another.
Within a month, you will have a rotation of three or four grains that you reach for without thinking. That is when cooking with ancient grains stops being a project and starts being second nature.
For recipe inspiration, explore our collection of ancient grains recipes - from weeknight grain bowls to impressive dinner party dishes. And for a deeper understanding of the grains themselves, browse our complete ancient grains list to learn about origins, nutrition, and flavor profiles.
Last updated March 12, 2026